Showing posts with label knitting. Show all posts

Tuesday, December 1, 2009

Well I did Sew Something

As I mentioned earlier, I was joining in with Creative Little Daisy for a challenge to Sew Something in November. Well, I did not sew the pants I was hoping to sew this month :( It looks like I will not hit that resolution after all. I did manage to have a lovely, successful shopping day with my girlfriend when I went out to the lower mainland this month, so I am not in need of pants as I was before.

Even though I did not sew the pants, I did sew something. I sewed a couple things for my friend, E. She needed a duvet cover made smaller to fit a quilt she had. Also, yesterday we worked on her family advent calendars together. I sewed those too. I did some hand sewing as well, finishing up the sneak peek project that may or may not have been for a certain spouse's birthday, which is today. (Happy Birthday, my love. We'll do it up right on Saturday.)


Here is how it turned out.


I'm actually pretty pleased with how it turned out. I was quite concerned as I was knitting it up, that I was knitting too tight and it wouldn't fit properly. How annoying would that be? Blocking was exactly the right thing to do. Its recipient is also pleased with the result and he claims not to have guessed ahead of time.


 The pattern came from the Canadian Living website. It was a little challenging for me to knit. No new skills; it just required my attention as I knit. A lot of things I like and end up doing are fairly simple to knit. How much more complicated does knitting get? Follow a pattern... it's pretty straightforward.

Sunday, November 22, 2009

Halloween Costume

I made a couple things for my daughter's Halloween costume this year. Only one of them was made specifically for Halloween and that's this lovely tutu.


Such a sassy little pose.

I made it using this tutorial from Grosgrain. It required almost no sewing. I made it using an Ikea Lill Curtains. The beauty of these curtains is that there is 5 square metres of fabric for only $7! Super sweet deal. I even left the little hem on the bottom since I thought it gave an interesting look to it. You'll notice that Z is indeed dressed for a Canadian Halloween, wearing multiple layers and warmness. It is definitely difficult to do cute girly costumes that are warm enough to wear outside. We had a relatively mild Halloween again this year, but you just never know what the weather is going to be like when you're planning. And now with class dress up parties, you almost need 2 separate costumes: one for wearing to school and one for going out in.


So, the one of the other things I made was the sweater (though not originally intending it for a costume), made from this pattern. I am kicking myself now for not printing this pattern out when I made it for my daughter (I'd just refer to the pattern on the computer). It was free then. It wasn't in Z's size, so I did have to re-size it which, now that she is selling it, the pattern creator has done. I'm pretty sure I could figure out what I did from examining the garment and from memory.

The striping was created from this random stripe generator which is SOOO sweet. The geek in me is kind of excited by the math and programming involved in this. I don't indulge my inner math/programming geek much, instead I just enjoy this little tool and play with all the different possibilities.


The last thing I made was this crown, made from this pattern by Midknight Knitter. I made it with a slight variation, sewing elastic in at the back and crocheting over it, so it would fit a bit better. I had also made this earlier, after one too many cheap plastic crowns broke from being stepped on or otherwise misused. I decided a crocheted crown would solve the broken crown problem, and it has. I made this one in January and it has lasted us until now, it pretty good condition, other than some stretching in the elastic.

Saturday, November 21, 2009

Lace Beret


This is a beret I made at the end of last year/beginning of this year. It was my Christmas break project. The lace pattern was a little bit addictive, so it only took me about 3 days. Of course, I have children and a husband and all that, so it wasn't really 3 days, but I do remember putting in a little more than just evenings. It was a mystery knit along pattern called "Meret" found on Ravelry. I didn't knit along, because the knit along was finished by the time I found the pattern.


Here it is being blocked. That's a charger plate it's being blocked on! I was a little worried this would stretch it out too much, but it's bounced back a little bit since and looks quite good. If you could see the other side of the charger plate, you would see that the brim of the hat comes almost to the middle of the plate, so blocking it on the charger plate did not stretch out the brim which is really important. I made 2 extra lace pattern repeats since I wanted a slouchy beret and I had read quite a few reviews that recommended doing 2 extra repeats before finishing off.

This is a great pattern for introducing lace knitting, since it's a pretty easily memorized pattern and fairly easy to see where you are in the pattern. It became quite addictive. I recommend it!

Wednesday, November 18, 2009

Sneak Peek & Light Matters

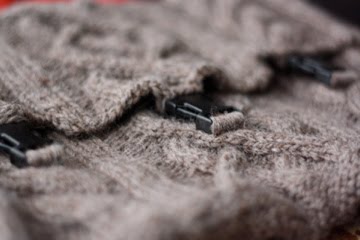
Ok. So, I can't really go into details here about this project because my husband reads this blog and this project may or may not be a gift for him. It's my own fault, really, since I gave him the gears for not subscribing to my craft blog through google reader. However, he has seen me working on it, he just doesn't know what it is (or he's supposed to pretend he doesn't know what it is, right honey?). But while I show you the sneak peek pictures, I thought I might demonstrate some differences in light and how important light is to taking a good picture.

I promise, I am by no means an expert on this, since I just got my lovely camera last year and I haven't taken a class or read a book. I just picked up bits and pieces by reading other people's blogs and taking pictures. I should note that I have a 50 mm lens, which was recommended to me by a friend whose pictures I always admired on Facebook. I could not be happier with this lens. As lenses go, this is one of the less expensive lenses and I've been so happy with the results. This lens lives on my camera. It lets lots of light in and allows me to take pictures all day and night without a flash. It also has a shallow depth of field which means that it focuses on the subject and blurs out the background. So, you see the kids playing, but the unfolded laundry in the background is blurry (perfect!).

Here are some pictures I took of my secret project last night while I was blocking it.


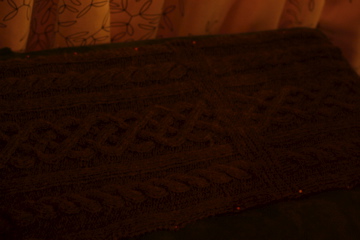
 This one was taken without the flash,
with some compact flourescent floor lamp lights pointed at it.


This one as taken with the flash.
The same lamps were on, but notice how you can't really tell?


This one was taken with the flash on, but with my hand in front of it.
I've experiemented with this technique before with a point and shoot camera and got better results.


This was also taken without the flash, with the same lamps as the first two shots.

These are the pictures I took this afternoon, about 1:30 pm. This is right by a west facing window, which gets lots of natural light all day. It's one of the things I love about our living room.

 
Makes a big difference doesn't it? The colour is just so much better.
Though, it is different. It's not actually 100% accurate.
The real colour is more brown and, at least on my computer, this looks pretty grey.


I'm pretty sure the reason the colour is a little washed out is because of all the light. I haven't played with my settings or anything to try to get a more accurate colour, but I prefer the natural light to the yellow-y colour I got in the photos last night.


A note about the pattern... this was a lot of work. It was interesting and I got a lot better at it as I went along, but it required a lot of my concentration. I'll give a reveal after it's complete and it is in its recipient's hands.

Saturday, November 14, 2009

Wrist Warmers

I love free patterns. If you are getting in the mood to make Christmas presents, now that it is mid-November, you should get on it. These cute wrist warmers would make a lovely little present. I can imagine wearing them in my office where my hands sometimes gets cold. I made some fingerless mittens which go halfway up my arms and I just couldn't figure out where I would wear them or what I would wear them with. They were super cute, but I'm just not sure I own anything funky enough to wear with them. Anyway, Creative Yarn has a free pattern for wrist warmers that are small and cute and would probably come together in a couple of evenings.

I thought of spoiling my daughter's pre-school teacher with a pair, though that might be a tad ambitious with the other gifts I am making this year.


Thursday, October 29, 2009

I made this: Owl Toque

I made this toque (winter hat for non-Canadians) last winter from some leftover yarn I had. I was going to make S's knit pants with stripes along the side, but I made a pair like that and I wasn't especially happy with them and they took a LONG time to make and were generally frustrating. So, this was going to be the stripe colour. And now it's a hat.


It took me a while to get those buttons. I had a hard time finding just what I wanted. You know when you get something in your head that has to be just right and you figure it's simple enough so it shouldn't be too difficult to find? That's what happened to those. I thought that orange irridescent buttons would be perfect, but they were not easy to come by. I eventually ordered them off Etsy for a pretty good price. Using the motif from this sweater, I figured out how many owls I would need to go around my head, made sure the stitches needed for that many owls was divisible by 4 (for 2x2 ribbing... I may have had to decrease a few stitches and increase after the ribbing) and cast on. It was actually a pretty easy pattern to create out of the sweater pattern. The ravelry pattern download is available here.

If I were to make it again, I think I would make a ribbing that would better suit the owls, so that the knit stitches matched up perfectly with the owls' feet. And I would do something different about the way I finished it because it has a pointy-ish top that I don't like so much. All in all, not so bad.

Sunday, October 25, 2009

In which I fail at knitting mittens


So, I was going to knit Z some mittens to match her new hat, which conveniently matches her coat. I'm new to knitting mittens. I knit myself a pair and they're falling apart because I just tried to get away with tying the yarns together and cutting them instead of weaving in all the ends. That was dumb.

Anyway, this is a brand new fail. I tried to knit these mittens on 2 needles and just seam up the sides. I can totally do this in crochet, but I like knit mittens because they use less yarn and they're not as holey as crochet mittens, so they can be a little warmer. Look how nasty the seam on the side is. Yuck. And they don't have a nice cute shape or anything. Now that I have one mitten, I have no desire to make the other one equally as ugly.

Incidentally, I used this basic mitten pattern formula. I do not think it's the fault of the pattern formula at all. Perhaps it was just the combination of yarn and size of mitten and my newbie mitten knitting skills and not knitting it in the round...

(sigh) What do I do now? Crochet a pair?

Saturday, October 24, 2009

I made these: wool pants

Here are the pants (or longies) I made for S a year or more ago. They're wool so once they are properly lanolized (coated with lanolin), then they act as a great breathable, water-resistant, natural diaper cover. He's been wearing them since I made them and as you can see in the picture above, they're a bit long on him there, but since the stockinette bottoms roll up a bit, they worked on him then and they still fit him now.

They're actually really lovely to knit. The pattern is so easy I don't even have to look at my hands, which makes it a great project for my Stitch & Chat group or watching TV. And they're so cute. I modified the pattern slightly, increasing a stitch down the pant legs every 5 or 6 rows which added an extra inch or so to the leg width to make them a little wider legged. D asked how many balls of yarn it would take to make a pair big enough for him. When asked he said he didn't want a pair, but I don't believe him.

Here are the wool shorties I made for Simon. These were made before the wool pants above. They were great for summer (last summer, but I can still squeeze him into them) They're cargo shorts, a little tighter than I'd like, maybe, but I really like them anyway.

This was taken before I added the drawstring.

S modeling the shorties with the drawstring.
I think it makes them look kind of beach-y.

My handsome boy.
Related Posts Plugin for WordPress, Blogger...